Double you Image Plates-NOW- FREE!!!

                      
     I'm so excited to show you fellow Konaddicts what I mean!  I discovered this a little while back, (about a month ago... on my girlfriend)  and showed the lovely Esther @ Konad USA.  We laughed at  how funny it was that no one came up with this idea sooner!
    Its pretty basic...ready for it?
                                     
                                    
    DOUBLE YOUR IMAGES BY MAKING A REVERSE OF THE IMAGE!                               
    You will need: 1 image plate, one special polish, 2 stampers, and one scraper.
                                                                                                           
    So basically you need to work quickly with fresh Konad Special Polish, if it is too thick, it may dry to fast before you can transfer it in the 3 steps it takes. start with the usual paint and scrape technique, then.....
    1)pick up the image with your one of your stampers
    2) instead of transfering it to your nail, transfer it to ANOTHER STAMPER,
    3) then roll the image onto your nail.
    You now have a reverse image of the original!
    This works great on images that are one sided, if you want to create a mirror on your opposite hand.  
    INSTANT
    FREE
    You are sooooo welcome!
    If you don't already have a second stamper,  You can stop by my shop and order one.  And if you do....better get stamping ! And please, post it to your blog, or email me pics!!!  Feel free to link back to this post for step by step tutorial.
    here are some examples of images that would work well (note: the left images are the reverse and then i just did a regular pick up on the right side so you can see how great the reverse looks- I didn't have time to do a bunch of mani's)
                                 

My Life has gone to the dogs!

    Fellow Konaddicts,
    It has been so long since I have logged on, I almost forgot my id and pass word!  Afetr an email I recieved from Evil Angel about an unrelated topic...I finally motivated myself to cut through the "stuff" and just get to it!
    I have many excuses/reasons why I have been away....none as darling as what will follow and what inspired this Konadicure.
                                                      
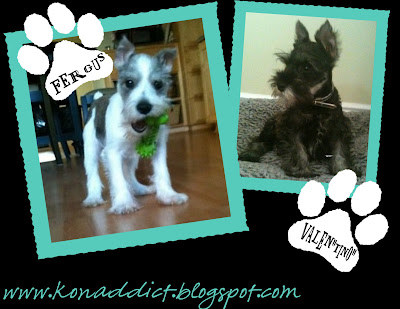
     Meet Fergus & Valen"Tino"

    Alex, My Oldest Daughter had a pretty sever and unexplained dog phobia (thats how we could best descibe it.)  For 2 years I have tried to help her get over this fear in many ways including viting neighborhood dogs, frequent trips to PetSmart, weekly dog books from the library...you name it-for 2years!  Well, her anxiety grew, and spread to cats, and bunnies.  We were not typically "dog" people.  I joked that I didn't want more poop and hair to clean up after than the two girls I already had! But, it became clear that "full immersion", so to speak, was the only way to cure her.  Well, it worked! For the last 2 months Alex has grown so confident and secure around Fergus AND EVEN OTHER DOGS! BIG DOGS!  Fergus is her hero!  An impulse buy this weekend led us to another Mini Schnauzer.  Charlie (my youngest daughter) wanted him so bad, & I loved his demeanor...thought Cesar Milan would approve of him.  So, now we have two- and they entertain not just us, but each other as well!
    On to the konadicure....
                                       
    I was trying to copy Fergus's parti coat with the patches.

    Here are the supplies you'll need:
                                           
    Konad Special polishes in black, light gray, and brown, Konad image plates m61 & m10, stamper scraper, white polish for your tips..any brand, and a top coat.  I used Konad, but you can use what ever you prefer.
    and here are the steps:
                                         
                                        
    Here is a closer look and more detailed instructions on how to create the color blend on the patches I did.
                                               
    1) polish dots of color OFF TO THE SIDE of the image
    2) use a toothpic or dotting tool to swirl the colors to get a little blend
    3) crape, you will see how the color graduates and is blended in some parts.

    Thanks for taking the time to read this LONG OVERDUE post.
    As promised (in an email)....later today I will post a SPECIAL on how t odouble your existing images collection....FREE.  Yeah....it will revolutionize your koand kits!  So, stay tuned!  

Total Pageviews