WIN A FREE Coraline Set!!!

    If you are DIEING to have these nails......... You better hurry up and get over to Sasse's 'nad Stamping Stampede with your Halloween Inspired Nails. You can create a nail design with almost any stamp...but make it ghoulish!!! For official rules and a list of her runner up prizes, click on the Coraline Kit image below to take you to her blog for more information. And spread the word....Let's all get our creative BLOOD running! Muahhhh haa haaa haaa haaa!!!!!
    Here is a picture of the Coraline kit YOU COULD WIN!!!! On the nails above, I used plates from both Coraline Kits...and a couple stars from my BIG pro-plate. Finally, I had a reason to use the letters to spell BOO!
    So go check out her contest........and get inspired by her many other designs and polish list!

San Frani Mani....& A Tranny

Blue Petal Tips

    I did these a while back...early this summer. Just now getting around to posting it. I wanted to try out a Konadicure with china glaze. Sassy is always using it to come up wit new designs.

    I have to say that while I like this manicure, and the style of the "water mark" konad looks good on this mani.... I am not impressed with he strength of the imprint. The design isn't strong enough to qualify this as a "truly konad compatible" color. So, do experiment with China Glaze, but don't expect it to reveal a dark design.

    And don't forget the toes! Actually I used a different plate for the toes, but using the same colors can make the two look cohesive. Because of my skin tone...I don't prefer the blue on my toes, not very flattering. But, perhaps it would look better on a lighter peachier complexion?
    What you need: Plate M24, base color, I used China Glaze for Audry here. A nail art polish w/skinny brush, stamping color (china glaze) and a sheer blush (my franken)

    The Steps:
    1. Paint tips free hand from left to right in a horizontal motion
    2. Stamp on image onto tips. Here you can choose a tip design, OR any design with a dense pattern.
    3. Clean the smile line to remove extra polish & overlapping design.
    4. paint sheer blush on the bottom 1/2 of nail.
    5. cover smile line with a purple nail art polish, making a thin line

Frosted Fairy Fingertips......as my daughter called them.

    These sparkly beauties elicited smiles & pure excitement from Alex (6). She said they were fairy nails, kind of like tinkerbell! I used a holographic glitter polish from Sally Hansen to bluff the smile line and add a touch of "sweetness" to this Konadicure. So you don't have to have a steady hand for this mani, or flat brush to clean your tips to a beautiful sharp smile line....just fake it & glitter it!!!
    Not bad for a drug store find. Both the green and the holo sparkle are from Sally Hansen line found @CVS drugstore. I show it in a blurred picture above so you can see just how enchanting all that sparkle is! Oh and see the fairy on the thumb.
    You will need image plate m35, a sheer blush, lime lights (opalescent green) & strobe light (sparkle) both from Salley Hansen, and finally a silver for the design.
    How to:
    1. Paint sheer blush over entire nail
    2. paint your tips with 2 coats of green Lime Lights
    3. Paint the sparkles horizontally over the smile line, this will fog the line and make the colors look like one graduates into the other.
    4. stamp petal clusters on fingers 2-5 and stamp the fairy on your thumb.
    OOOOOH just frosted fairy precious
    AND FINALLY I FOUND THE SITE WHERE I COPIED THE BASE NAIL....HERES MY INSPIRATION

Little Leopard Rockstar Nails

    This picture was taken a couple days after SHE CHIPPED THE TIPS ;(Last week was the first week of 1st grade!!!! HOORAY for Alex. After selecting her outfit, she wanted me to design some matching nails. She actually selected the gray color as the base. She wanted them to match her skirt. She also selected the fleur de lies to match the one on her shirt.
    Here's her outfit. And a close up of her thumb nail with the matching fleur de lies.
    I realized I never took a photo of the supplies, so I didn't design a page for that. I can try to to so later and edit this post.
    This is a basic design.
    1. Paint base coat
    2. Apply stamp leopard print
    3. Paint Tips. I used a nail art pen, they work THE BEST for little fingers french tips!
    4. Stamp thumbs with Fleur
    5. Add crystal to thumb, cenetr of fleur.

    Your little diva has rock star nails!!!!

Behold...The Birthday Nails!

    The birthday nails. By birthday, I mean my mother in law came by to have me paint her nails for her birthday....not really a birthday design. She had me REMOVE the fish design, and redo some nails for the evening. I decided to hide a 66 in there since it was her 66th. She looked at me funny when I suggested it, but decided to go with it in her usual light hearted manner! She wanted something"happy". Nothing happier than polka dots and pink! Do you see the hidden 66?!

    So, Here is what I used. A pink Essie color, Konad SP in black metalic & white. Plates m6 & m29.1. Apply Base coat

    2.Apply Polks dote to outter tipson a diagonal

    3. Layer double flower design over the polks dots, on a diagonal closer to the cuticle

    4. Finally, add crystals to the center of flowers on an accent nail.


Something's Fishy Here!!!

    Here are the fish nails I did after Hawaii. Never got the chance to upload them before leaving again. I was not in love with this look. I mean it was interesting to try, but not something that i would wear, or that stayed on my M-I-L very long.

    I do like the coral colored seahorse though.

    What I used was: M16, M27 Konad SP in white, metalic black, and pastel orange...which really is a coral color

    1. Paint base color

    2. Stamp bubles 2X on each nail, one @ the cuticle & one at the tips.

    3. Alternate variose designs as you wish on each nail. Using the bubbles on each nail as a base brings unity to the design, allowing it to all "match" even while using different colors & designs.

    I didn't photo each step when I did her nails, so....no step by step demo. But really, its all just layering freestyle, so you get the point?


FINALLY already.....geesh!

    OK...So, I lied waaay back when, that I was back. I came home long enough to unpack, wash clothes, & repack to head off to Sedona Arizona with my girls. So Before I upload those fishy nails & B Day nails...wanna see some vacation pics!? From red dirt in Kauai to the red dirt in Sedona AZ. Ill start with the most recent. Last week

    Sedona AZ


    In Sedona we Went on Helicopter ride to see the Red Rock from the skies..It was the girls first time!


    Charlie working the head gear Alex in heaven!!!!
    Slide Rock. Natural water slide.WEEEEE! Grasshopper Point,good jumping

    Red Rock Crossing Check out the rock in back! Beautiful!
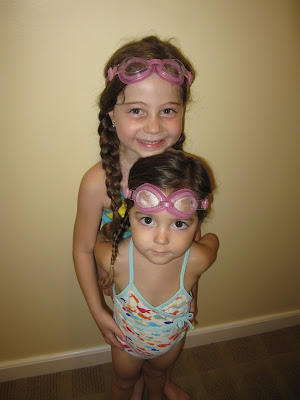
    These are our Kauai picturesKauai, Poi pu Beach. Beach House Restaurant. Every year we take a family photo here. Every year Charlie falls asleep, then wakes up in time for a picture. My girls ready to swim. Toooo damn cute haw?! The Hyatt Luau. Charlie is asleep again! But, on the bright side, made dinner easier...& she woke up for most of the show. YUP!!! I did...I went sky diving for the first time. Figured I couldn't do it in a more beautiful place than Kauai!
    Mike my sky dive tandem instructor
    Thanks for looking. My apologies for not blogging sooner!

Total Pageviews